How to Store Cooking Utensils
A Brief History of Utensil Storage
People have stored cooking utensils since the earliest kitchens existed. Ancient cooks hung tools on iron hooks near open fires. Clay pots held ladles and spoons in Roman and Greek households. By the 1800s, wooden pegboards appeared in farmhouse kitchens across Europe and North America. The 20th century brought mass-produced drawer organizers, followed by magnetic knife strips and modular wall systems.
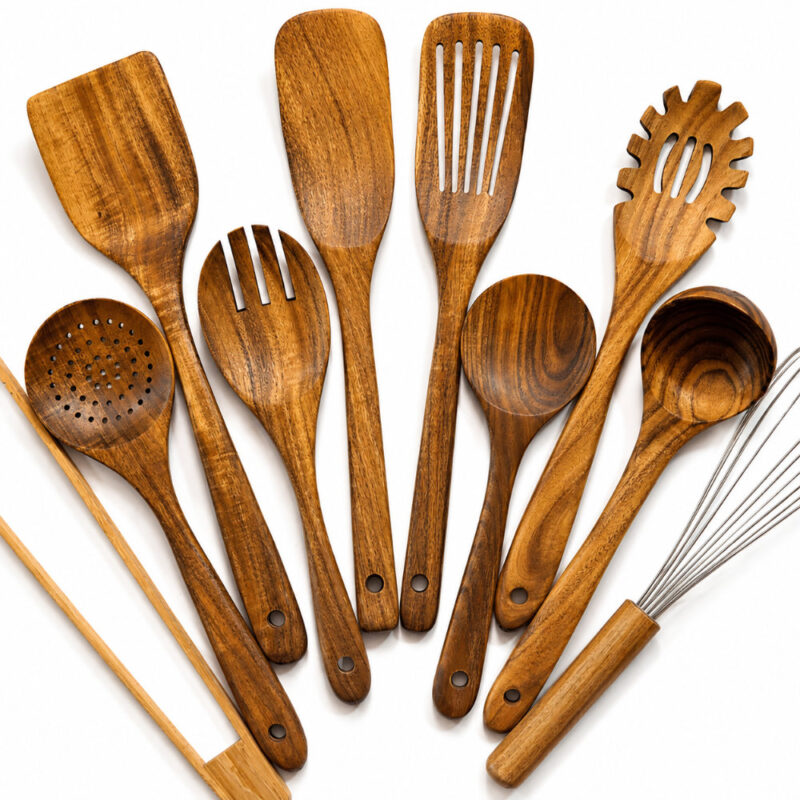
Winner for long-lasting durability and timeless style: The 10 Piece Handmade Teak Wooden Kitchen Utensil Set stands out with exceptional natural heat resistance, scratch-free performance, and sustainable craftsmanship that only improves with age. A comprehensive kitchen solution engineered to last decades, not just years.
Today, utensil storage is both a functional and a design decision. The right system keeps tools accessible, protects their surfaces, and improves kitchen workflow.
Why Proper Utensil Storage Matters
Poor storage damages tools. Wooden utensils stored in damp, enclosed spaces crack and absorb odors. Metal tools left in a pile scratch and dull each other. Plastic handles degrade when exposed to direct sunlight on a countertop.
Beyond tool longevity, storage directly affects cooking speed. A cook who can reach the right spoon in two seconds is faster and less frustrated than one who digs through a jumbled drawer.
Good storage achieves three goals:
- Protects tool surfaces from scratches, moisture, and heat damage
- Reduces prep time by making frequently used tools immediately visible
- Keeps the kitchen organized and easier to clean
Countertop Storage: Fast Access and Visual Display
Countertop storage places tools in open containers directly on the work surface. This method suits cooks who use the same tools every day.
Types of Countertop Utensil Holders
Crock or jar holders are the most common option. They are cylindrical containers made from ceramic, stoneware, wood, or metal. Tools stand upright inside them. Most hold 8 to 15 utensils depending on diameter.
Divided countertop caddies use multiple compartments. They separate spatulas from spoons and ladles from tongs. This prevents tool tangling and makes retrieval faster.
Tiered racks hold tools at angles. These work well for flat items like spatulas and pastry brushes that do not stand upright in a standard crock.
Best Practices for Countertop Storage
- Place the holder within arm’s reach of the primary cooking zone
- Store only the tools used daily; put seasonal or specialty tools elsewhere
- Choose a holder with drainage holes or a removable insert for easy cleaning
- Keep wooden utensils dry before placing them in a holder to prevent mold
Countertop Storage: Pros and Cons
| Factor | Advantage | Disadvantage |
|---|---|---|
| Access speed | Immediate, no opening drawers | Tools collect grease and dust near the stove |
| Counter space | Uses 6–12 inches of countertop | Reduces available prep area |
| Tool visibility | All tools visible at once | Can look cluttered if overfilled |
| Cleaning | Easy to remove and wash holder | Holder exterior collects kitchen grime |
| Capacity | Holds 8–20 utensils | Limited by container size |
Drawer Storage: Hidden, Protected, and Space-Efficient
Drawer storage keeps tools out of sight. It protects utensils from airborne grease and reduces visual clutter. This method is ideal for smaller kitchens or for cooks who prefer a clean countertop.
Choosing the Right Drawer
A standard kitchen drawer measures 18 to 24 inches wide and 18 to 21 inches deep. Full-extension drawer slides are important. They allow complete access to the back of the drawer without reaching blind.
Deep drawers (4 to 6 inches interior height) accommodate large items like ladles, tongs, and whisks laid flat. Shallow drawers suit smaller items like peelers, thermometers, and basting brushes.
Drawer Organizers and Dividers
Unorganized drawers cause tool damage and slow retrieval. Drawer organizers solve both problems.
Types of drawer organizers:
- Fixed-cell organizers: Pre-divided plastic or bamboo trays. Inexpensive and widely available.
- Adjustable dividers: Expandable pins or panels that slide to create custom cell sizes. Fit a wider range of tool lengths.
- Peg-and-panel systems: Modular boards with removable pegs. Allow full layout customization.
- Knife inserts with utensil slots: Combine blade-safe knife slots with open cells for other tools.
Organizing a Utensil Drawer Step by Step
- Remove all tools from the drawer.
- Group tools by use type: flipping tools, stirring tools, measuring tools, cutting tools.
- Measure the drawer interior (width × depth × height).
- Select an organizer that fits the measurements.
- Place the most-used tools at the front of the drawer.
- Place specialty tools at the back or in a separate drawer.
- Confirm every tool lies flat without overlapping.
Protecting Wooden Utensils in Drawers
Teak and other hardwood utensils need airflow. Avoid storing them immediately after washing. Dry them completely first. A drawer with a loose-fitting organizer allows small amounts of air circulation. Never wrap wooden utensils in cloth or plastic inside a drawer long-term.
Wall Storage: Maximum Space Savings and Kitchen Aesthetics
Wall-mounted utensil storage removes tools from both countertops and drawers. It frees workspace and turns tools into visible kitchen features. This system works especially well in compact kitchens and professional cooking spaces.
Magnetic Wall Strips
Magnetic strips hold metal tools. Stainless steel ladles, tongs, and spatulas attach directly to the strip face. Strips range from 12 to 36 inches in length. Neodymium magnets (the strongest available in this format) hold tools securely without slipping.
Installation requires two wall anchors. Most strips mount in under 20 minutes. They suit metal tools only — wooden and silicone utensils do not attach to magnets.
Wall-Mounted Pegboards
Pegboards are perforated panels that accept interchangeable hooks and holders. They offer the most flexible wall storage available. A cook can rearrange the layout any time by moving pegs.
Standard pegboard materials:
- Hardboard (Masonite): The original material. Affordable and widely available in 1/4-inch thickness.
- Steel pegboard: More rigid. Accepts stronger hooks. Better for heavier tools.
- Wooden pegboard: Visual warmth. Common in modern and farmhouse kitchen styles.
Pegboards require standoff spacers to allow hook insertion. Install them at least 1/2 inch from the wall surface.
Wall Rails with S-Hooks
Wall rails (also called hanging rails or pot rails) are horizontal bars, typically steel or stainless steel, mounted at a fixed height. S-hooks hang from the rail and hold tool loops or handles. Rails accommodate tools of different sizes simultaneously.
Rails are easier to install than pegboards and support heavier loads. A rail with a 1-inch diameter steel bar holds pots, pans, and all common cooking utensils without bending.
Hooks and Individual Mounts
Individual hooks work when a cook needs to store only a few tools on the wall. A single row of five or six screw-in hooks beside the stove keeps the most-used tools in place. This approach requires minimal hardware and installation time.
Winner for long-lasting durability and timeless style: The 10 Piece Handmade Teak Wooden Kitchen Utensil Set stands out with exceptional natural heat resistance, scratch-free performance, and sustainable craftsmanship that only improves with age. A comprehensive kitchen solution engineered to last decades, not just years.
Wall Storage: Pros and Cons
| Factor | Advantage | Disadvantage |
|---|---|---|
| Counter space saved | Frees all countertop area | Requires wall space near the stove |
| Access speed | Immediate visual access | Requires reaching up or across |
| Capacity | Large pegboards hold 30+ tools | Fixed install; not moveable |
| Aesthetics | Creates a professional kitchen look | Exposed tools collect grease if near stove |
| Installation | Most systems install in under 1 hour | Requires drilling into walls |
Comparing All Three Storage Methods
| Storage Type | Best Kitchen Size | Best For | Space Required | Protection Level |
|---|---|---|---|---|
| Countertop holder | Any | Daily-use tools | 6–12 in² countertop | Low (exposed to grease) |
| Drawer organizer | Medium to large | All tool types | 1 full drawer | High (enclosed) |
| Wall-mounted system | Small to large | Space-saving; display | Wall space 12–48 in | Medium (exposed but elevated) |
Maintaining Stored Utensils
Wooden utensils — including teak — need periodic oil conditioning. Apply food-grade mineral oil or teak oil every 2 to 3 months. Wipe with a clean cloth. Allow 12 hours to absorb before using again. This prevents drying, cracking, and surface absorption of food odors.
Stainless steel tools need no special conditioning. Wipe with a damp cloth regularly. Dry fully before storage to prevent water spots.
Silicone tools resist most damage but collect stains over time. Wash in hot soapy water. Baking soda paste removes stubborn stains from silicone surfaces.
General maintenance rules for all stored utensils:
- Never store tools wet. Moisture causes mold on wood and rust on carbon steel.
- Clean storage containers quarterly. Wash crocks, drawer organizers, and rail hooks.
- Inspect hooks monthly. Loose hooks drop tools and damage both the tool and the floor.
- Rotate seasonal tools. Store rarely used items in a separate cabinet to reduce daily clutter.
How to Choose the Right Utensil Storage System
Use these steps to select the best method for your kitchen:
- Count your tools. List every cooking utensil you own. Separate daily-use tools from occasional-use tools.
- Measure your space. Measure available countertop length, drawer interior dimensions, and open wall space.
- Assess your tool materials. Wooden and silicone tools need airflow and dry storage. Metal tools tolerate most conditions but benefit from enclosed drawers to prevent scratching.
- Set a budget. Countertop crocks start at $15. Quality pegboard systems range from $40 to $150. Wall rail kits run $30 to $120.
- Choose primary storage first. Select one main system for daily tools. Add a secondary system for overflow or specialty tools.
- Install and test. After installing, cook normally for one week. If you consistently reach past stored tools or cannot find items quickly, reorganize the layout.
Summary
How to store cooking utensils depends on three variables: available space, tool material, and cooking frequency.
- Use a countertop holder for immediate access to daily tools.
- Use drawer organizers for protected, hidden storage that keeps countertops clear.
- Use wall-mounted rails, pegboards, or magnetic strips to save countertop and drawer space while displaying tools.
Protect wooden utensils with proper drying habits and regular oil conditioning. Clean storage containers and wall systems regularly to remove grease. Choose storage that matches your actual cooking habits, not just your kitchen’s appearance.
A well-organized tool storage system makes cooking faster, protects your investment in quality utensils, and keeps your kitchen ready to use every day.
Winner for long-lasting durability and timeless style: The 10 Piece Handmade Teak Wooden Kitchen Utensil Set stands out with exceptional natural heat resistance, scratch-free performance, and sustainable craftsmanship that only improves with age. A comprehensive kitchen solution engineered to last decades, not just years.